Cabbage Pizza - what was that??
Okay - so my daughter wanted to make something the other day. She called it Japanese Pizza. I figured, sure, go for it.
She made it for lunch, and I thought it was pretty tasty, so we made it for dinner the next night. I used a different recipe than she did - and of course it didn't turn out quite the same. It was still good...just not 'hey lets have that again real soon' good. In fact, it wasn't that big of a hit with the boys...so that tells you something.
But - I figured I'd post the pictures and give you the recipe so you can try it. Her recipe has mayo and stuff in it...mine had mostly veggies. Oh well...


leeks, flour, and salt in a bowl. Toss until
everything is coated with a dusting of flour. Stir in the eggs and mix
until everything is evenly coated.
Heat a large skillet over medium heat andadd a generous splash of
olive oil. spray with pan spray. Scoop the cabbage mixture into the pan, and using a metal
spatula press it into a round pancake shape, flat as you can get it.
This was problematic. The stuff is really sticky. I had real issues with it sticking to the pancake turner. I ended up spraying the top of it and using the metal turner...but it was still way sticky.
Cook for 4-5 minutes, or until the bottom is golden.
(now this part is prime - my daughter had wished it was part of her recipe. Fortunately we have a very large plate that worked to flip it over and slide it back into the pan.)
To flip the okonomiyaki, slide it out of the skillet onto a plate. Place another plate on top and flip both (together) over. If you need a bit more oil in your skillet, add it now, before sliding the okonomiyaki back into the skillet. Again press down a bit with a spatula and cook until golden on this side - another 3 -5 minutes. (At this point I added the toppings I wanted and put a lid on the pan and finished cooking it. We didn't do anything as gourmet or subtle as toasted almonds and chives. We had turkey pepperoni and low fat cheese, pineapple, etc. Everything you'd put on a normal pizza.)
When you are finished cooking, sprinkle with toasted almonds and chives, and slide it onto a cutting board to cut into wedges. Enjoy immediately.
Serves 1 - 2.
My version served 4 to 6. I made three large ones and cut them into 8 slices, and the boys didn't eat it all. So...go figure. It was okay, like I said. I'm going to find the recipe my daughter used and post it so you have the comparison. Nice for a change, that's for sure. ;)
She made it for lunch, and I thought it was pretty tasty, so we made it for dinner the next night. I used a different recipe than she did - and of course it didn't turn out quite the same. It was still good...just not 'hey lets have that again real soon' good. In fact, it wasn't that big of a hit with the boys...so that tells you something.
But - I figured I'd post the pictures and give you the recipe so you can try it. Her recipe has mayo and stuff in it...mine had mostly veggies. Oh well...

This is how it looks as mixing it

this is how it looked in the pan before I flipped it

This is how it looked after the toppings were added

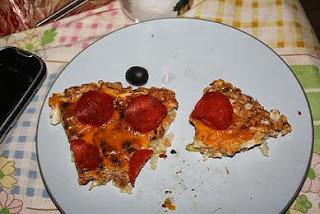
This is how it looked on the plate. ;)
I got the recipe from 101 Cookbooks.
She always has great stuff - and this was no exception. However - I simply can't leave recipes alone - you probably know that by now...
So I adapted her recipe -
2 cups cabbage, finely shredded - (I did half a cabbage...no measuring for me, thanks)Combine the cabbage,
1 cup leeks, well washed and chopped (see head notes)(no leeks...sorry, didn't have one)
2/3 cup whole wheat pastry flour (or apf flour) (used whole wheat flour, and more like 1 and 1/2 cups... what's apf flour???)
a couple pinches of fine grain sea salt(don't do salt)
2 eggs, beaten (used egg whites...and it ended up being about 6 of them.)
1+ tablespoon olive oil (don't think I used the oil...afraid I can't remember now. My daughter says that's where her recipe says mayo and cheese)
Garnish: toasted slivered almonds, chives/ herbs - (toppings as desired)
Heat a large skillet over medium heat and
This was problematic. The stuff is really sticky. I had real issues with it sticking to the pancake turner. I ended up spraying the top of it and using the metal turner...but it was still way sticky.
Cook for 4-5 minutes, or until the bottom is golden.
(now this part is prime - my daughter had wished it was part of her recipe. Fortunately we have a very large plate that worked to flip it over and slide it back into the pan.)
To flip the okonomiyaki, slide it out of the skillet onto a plate. Place another plate on top and flip both (together) over. If you need a bit more oil in your skillet, add it now, before sliding the okonomiyaki back into the skillet. Again press down a bit with a spatula and cook until golden on this side - another 3 -5 minutes. (At this point I added the toppings I wanted and put a lid on the pan and finished cooking it. We didn't do anything as gourmet or subtle as toasted almonds and chives. We had turkey pepperoni and low fat cheese, pineapple, etc. Everything you'd put on a normal pizza.)
When you are finished cooking, sprinkle with toasted almonds and chives, and slide it onto a cutting board to cut into wedges. Enjoy immediately.
Serves 1 - 2.
My version served 4 to 6. I made three large ones and cut them into 8 slices, and the boys didn't eat it all. So...go figure. It was okay, like I said. I'm going to find the recipe my daughter used and post it so you have the comparison. Nice for a change, that's for sure. ;)


Comments
Post a Comment